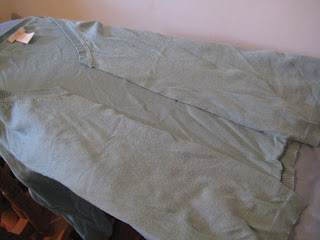
In my closet, I had a pullover that I just never wore. It made me feel frumpy to wear it, so it just sat there. As I prefer cardigans, I decided to transform it into one.
Details on how I did it are after the jump...
Here is how the original pullover looked. Nothing fancy. Plus, it had an oil stain right in the front that showed in certain lighting (it took a few pictures, but it's there in this one).
Materials
- Pullover sweater
- No sew hem tape
- Iron
- Machine thread and sewing machine (optional)
Instructions
First, I cut the sweater down the centre. I used one of the columns of stitching as a guide.
While I was at it, I also removed all the annoying tags that always scratch me.
I gave a quick ironing to the sides to get rid of any wrinkles. I then applied no-sew hem tape to the sides of the opening to stabilize the fabric.
My no-sew tape is just the peel and stick kind. No ironing was required. The iron-on version maybe better, as the kind I have is only temporary.
I measured both sides to make sure I did not pull one side longer than the other when applying tape. In hindsight, it may have been better to apply the tape before I cut the pullover, as my sweater was very stretchy and it was hard to get both sides to match up.
I folded over the seam. Then, because the tape is only temporary, I gave it a quick sew with my sewing machine (using a ball-point needle).
That was it. I now have a new cardigan that better suits my wardrobe.
The best part is that the stain is no longer visible. I would have just thrown this pullover out because of the stain, but now it has a new life as a cardigan.
Recommended Readings
The original post that gave me the idea, "DIY 10 Min Cardigan from Sweater" is here at Vanilla Joy.
Here is another good post from Look Ma No Patterns.


2 comments
I have also seen this idea, and have been dying to make my own version. I think I finally have the perfect sweater to try it out on. Great results!
ReplyDeleteThanks Diane!
Delete