
Week 3: Exploring Shape
This exercise was about exploring the shapes that make us feel comfortable and happy. The shapes I picked before, are the same when I think about shapes in that way. However, this can lead to a big problem - what if what you like, is not what is what other people are wearing?
On a recent trip to the 'big' city (Vancouver from my small town), I took the time to study current mainstream fashion. In the past, I used to spend this time buy RTW clothing at stores that aren't in my town - even if I didn't really need the clothes. On this trip, instead of buying anything, I peaked into clothing stores and people-watched around me.
I noticed one important thing: skinny pants are 'it'. By 'it', I mean that they are not just what's 'in', but that are all you can buy and all that people wear. They are IT - there were no other types of pant styles available.
While I (along with other wide hip ladies) may feel that bootleg or some other style of pant is best, there is a point where I will just look out of place if I don't adopt current clothing shapes. Sort of like wearing bell bottoms outside of the 1970s or pleated pants outside of the 1990s (until they make a comeback someday). Or, even more extreme, what if I thought I looked awesome in a Victorian Bustle Dress (and I totally do)? Outside of a steampunk costume event, I would look really out of place.

Some attention has to be paid to the social conventions around dress for your area/culture/age group, while picking shapes. You can deviate from the norm and wear whatever you want. But to pull it off successfully, you need to be confident and/or privileged.
So, instead of being overwhelmed by all of this, I'm going to think of the shapes that go with my style (so, somewhat preppy) and that are rated high on my worksheet (e.g. pants). I shouldn't be thinking of all shapes, but the ones that go with my style.
All this to say, I think I've opened my heart a little to skinny pants. And, my other shapes are blouses, tops, cardigans, and pullovers (since I can't really go topless).
Week 4: Building Silhouettes
Week 3 and week 4 almost have to be done together. You can't think about clothing shapes without thinking of balance and the overall look.
To achieve balance, you have to combine pieces that are structured and unstructured. So, if I pick skinny pants as a shape, I then need more flowy, unstructured tops to balance the outfit (as opposed to very fitted tops). That sounds good to me - flowy tops look nice and comfortable. Below are some Burdastyle blouse patterns that would work (I have most of these patterns already - yay!).

Here are a list of silhouettes that I could make (from cooler to warmer weather):
This exercise was about exploring the shapes that make us feel comfortable and happy. The shapes I picked before, are the same when I think about shapes in that way. However, this can lead to a big problem - what if what you like, is not what is what other people are wearing?
On a recent trip to the 'big' city (Vancouver from my small town), I took the time to study current mainstream fashion. In the past, I used to spend this time buy RTW clothing at stores that aren't in my town - even if I didn't really need the clothes. On this trip, instead of buying anything, I peaked into clothing stores and people-watched around me.
I noticed one important thing: skinny pants are 'it'. By 'it', I mean that they are not just what's 'in', but that are all you can buy and all that people wear. They are IT - there were no other types of pant styles available.
 |
| J. Crew |
Some attention has to be paid to the social conventions around dress for your area/culture/age group, while picking shapes. You can deviate from the norm and wear whatever you want. But to pull it off successfully, you need to be confident and/or privileged.
So, instead of being overwhelmed by all of this, I'm going to think of the shapes that go with my style (so, somewhat preppy) and that are rated high on my worksheet (e.g. pants). I shouldn't be thinking of all shapes, but the ones that go with my style.
All this to say, I think I've opened my heart a little to skinny pants. And, my other shapes are blouses, tops, cardigans, and pullovers (since I can't really go topless).
Week 4: Building Silhouettes
Week 3 and week 4 almost have to be done together. You can't think about clothing shapes without thinking of balance and the overall look.
To achieve balance, you have to combine pieces that are structured and unstructured. So, if I pick skinny pants as a shape, I then need more flowy, unstructured tops to balance the outfit (as opposed to very fitted tops). That sounds good to me - flowy tops look nice and comfortable. Below are some Burdastyle blouse patterns that would work (I have most of these patterns already - yay!).
Here are a list of silhouettes that I could make (from cooler to warmer weather):
- Skinny pants, flowy blouse, cardigan
- Skinny pants, flowy blouse, blazer
- Crop pants, button-down blouse, tank top
- Capri pants/shorts/skirt, flowy blouse, cardigan
- Capri pants/shorts/skirt, t-shirt/tank top, cardigan
After going through all of the Coletterie Wardrobe Architect exercises and now that I know how they work together, I'm going to revise my answers. With this post, I'm going to go back over weeks 1 to 2.
Week 1: Making Style More Personal

This first exercise is designed to make style "more personal". We were to discuss different parts of our identities and how they affect our style.
For the most part, my answers are the same as they were before. However, I missed discussing a big part of identity in relation to clothing: philosophy.
My philosophy could be a mix of Feminism, Socialism, Humanism, Anti- consumerism, Environmentalism, and maybe Anarcho-syndicalism. whew... All of this, in relation to clothing, means that I don't like the way clothing is made and consumed currently.
I don't like sweatshops and the horrible labour conditions people work in (the fire in Bangladesh is an extreme example).
I don't like that women who buy RTW clothing are made to feel horrible about their bodies, because the mass produced crap doesn't fit.
I don't like that our closets and garbage dumps are full of fast fashion.
All of this is why I got back into sewing in the first place. So, while this may not point to an exact style, it does say that I want clothes that fit and make me feel good, I want clothes that weren't made in a sweatshop, and I want clothes that are good quality and not fast fashion.
Week 2: My Core Style
I thought a lot more about this. I really wanted to get a better handle on a style than I did before. I want a style that will work with my goal to create a wardrobe that will last. It needs to be about quality and not quantity. I'm not as young as I once was, so it needs to be 'grown-up'. It needs to somewhat androgynous and to work for indoors and outdoors. Basically, it needs to reflect my lifestyle and what I am comfortable with.
What I came up with is going 'preppy'. Imagine the types of clothes worn by someone going yachting. The kinds of clothes you might find at Ralph Lauren or J. Crew. Or think of the likes of Jackie O.

While dressing 'preppy' is kinda "in" right now, most of the basics have been the same for decades. These outfits are simple, yet have a bit of a timeless quality to them. Certain colours might change and pant leg styles definitely do, but for the most part it is a way of dressing that emphasizes the quality of the clothing rather than being at the height of fashion. It is also a style that is more about comfort, which I also appreciate.
I'm not going to be strict with myself and only dress in preppy styles, but I think I can use it a a guide. Lots of clean lines and solid colours.
It seems a bit weird/shallow/obsessive to spend so much time thinking about what style of clothing I want to wear. I recognize that worrying about my wardrobe is absolutely a 'First World Problem'. However, if I'm going to care about how my clothes are made (especially, if I'm taking the time to make them myself) and the environment, it only makes sense to pick a wardrobe that is comfortable and will last. And by last, I mean not only the quality and durability, but that it won't look out of place in years to come.
PS. Here is an interesting blog post on the Roots of American Preppy and the Wikipedia page on Preppy.
Week 1: Making Style More Personal
This first exercise is designed to make style "more personal". We were to discuss different parts of our identities and how they affect our style.
For the most part, my answers are the same as they were before. However, I missed discussing a big part of identity in relation to clothing: philosophy.
My philosophy could be a mix of Feminism, Socialism, Humanism, Anti- consumerism, Environmentalism, and maybe Anarcho-syndicalism. whew... All of this, in relation to clothing, means that I don't like the way clothing is made and consumed currently.
I don't like sweatshops and the horrible labour conditions people work in (the fire in Bangladesh is an extreme example).
I don't like that women who buy RTW clothing are made to feel horrible about their bodies, because the mass produced crap doesn't fit.
I don't like that our closets and garbage dumps are full of fast fashion.
All of this is why I got back into sewing in the first place. So, while this may not point to an exact style, it does say that I want clothes that fit and make me feel good, I want clothes that weren't made in a sweatshop, and I want clothes that are good quality and not fast fashion.
Week 2: My Core Style
I thought a lot more about this. I really wanted to get a better handle on a style than I did before. I want a style that will work with my goal to create a wardrobe that will last. It needs to be about quality and not quantity. I'm not as young as I once was, so it needs to be 'grown-up'. It needs to somewhat androgynous and to work for indoors and outdoors. Basically, it needs to reflect my lifestyle and what I am comfortable with.
What I came up with is going 'preppy'. Imagine the types of clothes worn by someone going yachting. The kinds of clothes you might find at Ralph Lauren or J. Crew. Or think of the likes of Jackie O.
I'm not going to be strict with myself and only dress in preppy styles, but I think I can use it a a guide. Lots of clean lines and solid colours.
It seems a bit weird/shallow/obsessive to spend so much time thinking about what style of clothing I want to wear. I recognize that worrying about my wardrobe is absolutely a 'First World Problem'. However, if I'm going to care about how my clothes are made (especially, if I'm taking the time to make them myself) and the environment, it only makes sense to pick a wardrobe that is comfortable and will last. And by last, I mean not only the quality and durability, but that it won't look out of place in years to come.
PS. Here is an interesting blog post on the Roots of American Preppy and the Wikipedia page on Preppy.
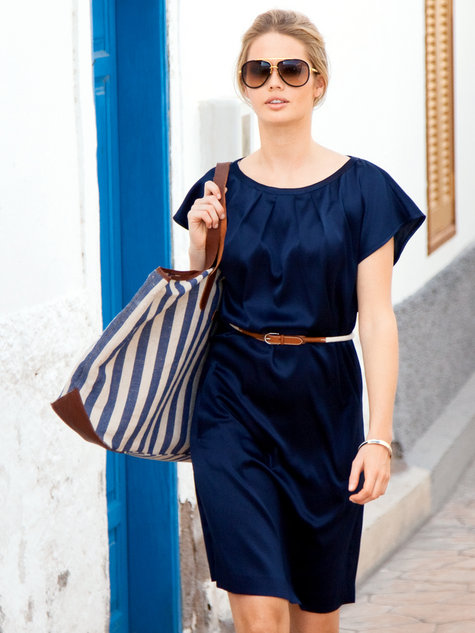
Using some more of the knit fabric I found in Tucson, I made myself a nice summer dress. The fabric is striped and had a bit of a 1980's retro feel to it, so I went with a pattern that matched. I choose Burdastyle 04/2013 #108.

I also wanted to make a dress for the Simple Dress Challenge for the sewing group I'm part of (Stitch Once Rip Twice).
Pattern
Burdastyle 04/2013 #108
This pattern is meant to be used with satin fabric, but I figured I would try it with a knit.
Materials

The pattern itself is nice and simple, but the knit fabric was more of a challenge then I thought it would be. The fabric is very slinky, so I was hard to make it lie flat, let alone try to match up the stripes. I must have spent 3 hours cutting out the front and back, when usually I'm super fast at cutting. Frustrating!

I'm happy with how well I got the stripes to line up at the end. I placed the large dark band at below my waist, so it falls into the background. While, the brighter stripes fall on my bust and hips and highlight those areas. Overall, it gives more of an hourglass look.
I knew that I wouldn't need as much ease as I would if I were using satin, but I kept it a bit large anyway. I wanted it to be nice and comfortable. I cut a size 40 on top and size 42 from at the waist down (which is what my measurements are on the chart).

Alterations
I only made a few changes. I sewed the neck and arm bindings on the inside instead of on the outside. And I sew side in-seam pockets instead of front welt pockets.
I wish I had make the neck hole a little smaller. The knit fabric makes the opening larger and my bra straps pop out now and then. Not too big of a deal though.
I also used 1/4" elastic for the waist instead of a belt. This makes the dress really easy to throw on and go.
Overall, I'm really happy with how this turned out. It's great for hot weather, which is when I like to wear dresses the most.
I also wanted to make a dress for the Simple Dress Challenge for the sewing group I'm part of (Stitch Once Rip Twice).
Pattern
Burdastyle 04/2013 #108
This pattern is meant to be used with satin fabric, but I figured I would try it with a knit.
Materials
- Knit fabric
- 1/4" elastic
- Thread
The pattern itself is nice and simple, but the knit fabric was more of a challenge then I thought it would be. The fabric is very slinky, so I was hard to make it lie flat, let alone try to match up the stripes. I must have spent 3 hours cutting out the front and back, when usually I'm super fast at cutting. Frustrating!
I'm happy with how well I got the stripes to line up at the end. I placed the large dark band at below my waist, so it falls into the background. While, the brighter stripes fall on my bust and hips and highlight those areas. Overall, it gives more of an hourglass look.
I knew that I wouldn't need as much ease as I would if I were using satin, but I kept it a bit large anyway. I wanted it to be nice and comfortable. I cut a size 40 on top and size 42 from at the waist down (which is what my measurements are on the chart).
Alterations
I only made a few changes. I sewed the neck and arm bindings on the inside instead of on the outside. And I sew side in-seam pockets instead of front welt pockets.
I wish I had make the neck hole a little smaller. The knit fabric makes the opening larger and my bra straps pop out now and then. Not too big of a deal though.
I also used 1/4" elastic for the waist instead of a belt. This makes the dress really easy to throw on and go.
Overall, I'm really happy with how this turned out. It's great for hot weather, which is when I like to wear dresses the most.
I like my Colette Cooper a lot, but I needed a lighter bag for shopping. So, the Cooper "Lite" was born!

It's a nice light, backpack. I was able to use some cheap cotton fabric in my stash to make it.

Instructions
1. Cut out your fabric

Use the body piece of the Colette Cooper pattern and cut two body pieces on the fold. (Note: if you don't have this pattern, just cut 2 rectangles that are roughly 17" x 20"). I made my piece a little wider at the top and added 2" for the bag opening hem.
2. Sew the bag using french seams

Starting 2" below to top, sew the bag with right sides out. End 2" from the top on the other side. Trim the seam allowances and then flip the bag inside out. Sew the seams a second time about 1/4" from the edge - this is a french seam.
At the top of the bag, snip the seam allowances at the 2" mark. Press open the seams and stitch in a U-shape around the opening. Do this for both sides of the bag.

3. Sew the top hem of the bag and add cord
Sew the hem of the bag (I folded over 1/2" and then another 3/4"). Leave the hem wide enough to fit two cords through.
Cut two pieces of cord that are 60" long each. (Note: if you are having trouble finding cord, I found my cord at a camping supply store in the tent repair area).
Feed one of the cords through one side of the bag opening and then back through the other side.


4. Reinforce the bottom corners.
Apply interfacing to the bottom 2" of the corners (seen in the 1st picture of Step 2).
For extra reinforcement, slide pieces of felt into the corners of the bag, with the bag right side out.

Stitch across the bottom corners and add grommets. Make sure your grommet is just the right size for 2 cords to fit through.

Take the cord on one side of the bag and feed it through the grommet below it. Tie a knot to secure it.

5. Make an inner bag
Cut a piece of fabric about 10" long by 5" wide. Fold the fabric in half so you have a 5" x 5" square. Using french seams, sew side seams. On one side, leave a 1" opening and reinforce it with stitching (as was done for the main bag above).

Turn over the hem about 1/2" and sew hem while cord is in place (a zipper foot can help). Tie the cord ends together.
Sew the smaller bag inside out to the seam allowance of the larger bag (also inside out). Attach it about 2" down from the bag opening.

That's it! you know have a nice little, folding backpack.

The shoulder straps close the bag opening nice and tight, while it's in use.

Maybe I'll go use it to buy more fabric!
It's a nice light, backpack. I was able to use some cheap cotton fabric in my stash to make it.
Instructions
1. Cut out your fabric
Use the body piece of the Colette Cooper pattern and cut two body pieces on the fold. (Note: if you don't have this pattern, just cut 2 rectangles that are roughly 17" x 20"). I made my piece a little wider at the top and added 2" for the bag opening hem.
2. Sew the bag using french seams
Starting 2" below to top, sew the bag with right sides out. End 2" from the top on the other side. Trim the seam allowances and then flip the bag inside out. Sew the seams a second time about 1/4" from the edge - this is a french seam.
At the top of the bag, snip the seam allowances at the 2" mark. Press open the seams and stitch in a U-shape around the opening. Do this for both sides of the bag.
3. Sew the top hem of the bag and add cord
Sew the hem of the bag (I folded over 1/2" and then another 3/4"). Leave the hem wide enough to fit two cords through.
Cut two pieces of cord that are 60" long each. (Note: if you are having trouble finding cord, I found my cord at a camping supply store in the tent repair area).
Feed one of the cords through one side of the bag opening and then back through the other side.
Do the same with the second cord, starting at the other end.
To stop the cord from fraying at the ends, use a lighter or match to melt the cord a bit.
Apply interfacing to the bottom 2" of the corners (seen in the 1st picture of Step 2).
For extra reinforcement, slide pieces of felt into the corners of the bag, with the bag right side out.
Stitch across the bottom corners and add grommets. Make sure your grommet is just the right size for 2 cords to fit through.
Take the cord on one side of the bag and feed it through the grommet below it. Tie a knot to secure it.
Cut a piece of fabric about 10" long by 5" wide. Fold the fabric in half so you have a 5" x 5" square. Using french seams, sew side seams. On one side, leave a 1" opening and reinforce it with stitching (as was done for the main bag above).
Turn over the hem about 1/2" and sew hem while cord is in place (a zipper foot can help). Tie the cord ends together.
Sew the smaller bag inside out to the seam allowance of the larger bag (also inside out). Attach it about 2" down from the bag opening.
That's it! you know have a nice little, folding backpack.
The shoulder straps close the bag opening nice and tight, while it's in use.
I had some more knit fabric left from my trip to Tucson, so I jumped right in to making another Renfrew top.

Materials:
Pattern
Sewaholic Renfrew
As with my first Renfrew, I made a size 6 (I am a size 10 according to the measurement chart). Size 6 in this material was a little snug. A size 8 would have been better. A size 6 worked fine for my first Renfrew, as that fabric was stretchier.
I compared the two fabrics and the grey fabric stretches an amazing 100% (a 4" piece can be stretched to 8"). This blue fabric is still very stretchy, but not as much. It stretches about 50% (a 4" piece stretches to 6"). So, if I am using a more stable knit, I am closer to what the pattern envelop says. Overall, I'm pretty happy with it.

Alterations
Like with my first Renfrew, I used bias tape in place of stay tape.
I made a few alterations after analysing my other Renfrew. I made a swayback adjustment of about 1", which stopped the pooling of fabric at my back.
I also altered the armhole to stop the wrinkling under the armpits and across the top of the bust. I scooped out 3/4" on the front and back underarms. I also added a small bit just above this that sticks out 1/8" at most (see picture below). Basically, this straightens out the armhole and makes it more like an RTW t-shirt.

I then had to measure the new armhole seams to figure out if I needed to lengthen the sleeve cap seam length. I measured that I needed 8mm (about 3/8") each for the front and the back. At about 2" from the top of the sleeve, I slashed the pattern piece to the bottom centre and spread. This is what it looked like:

Here is a closer up view:

That did the trick. My armpit is no longer 'winking' at everyone and the shirt is more comfortable. Now, I only have a few wrinkles here and there that are more like 'normal' t-shirt wrinkles.

I love this Renfrew and want to wear it all the time!
Materials:
- Jersey knit
- Thread
- Bias Tape (in lieu of stay tape)
Pattern
Sewaholic Renfrew
As with my first Renfrew, I made a size 6 (I am a size 10 according to the measurement chart). Size 6 in this material was a little snug. A size 8 would have been better. A size 6 worked fine for my first Renfrew, as that fabric was stretchier.
I compared the two fabrics and the grey fabric stretches an amazing 100% (a 4" piece can be stretched to 8"). This blue fabric is still very stretchy, but not as much. It stretches about 50% (a 4" piece stretches to 6"). So, if I am using a more stable knit, I am closer to what the pattern envelop says. Overall, I'm pretty happy with it.
Alterations
Like with my first Renfrew, I used bias tape in place of stay tape.
I made a few alterations after analysing my other Renfrew. I made a swayback adjustment of about 1", which stopped the pooling of fabric at my back.
I also altered the armhole to stop the wrinkling under the armpits and across the top of the bust. I scooped out 3/4" on the front and back underarms. I also added a small bit just above this that sticks out 1/8" at most (see picture below). Basically, this straightens out the armhole and makes it more like an RTW t-shirt.
I then had to measure the new armhole seams to figure out if I needed to lengthen the sleeve cap seam length. I measured that I needed 8mm (about 3/8") each for the front and the back. At about 2" from the top of the sleeve, I slashed the pattern piece to the bottom centre and spread. This is what it looked like:
Here is a closer up view:
I love this Renfrew and want to wear it all the time!
